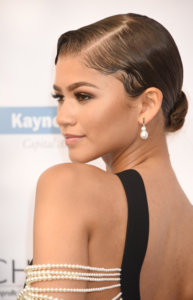
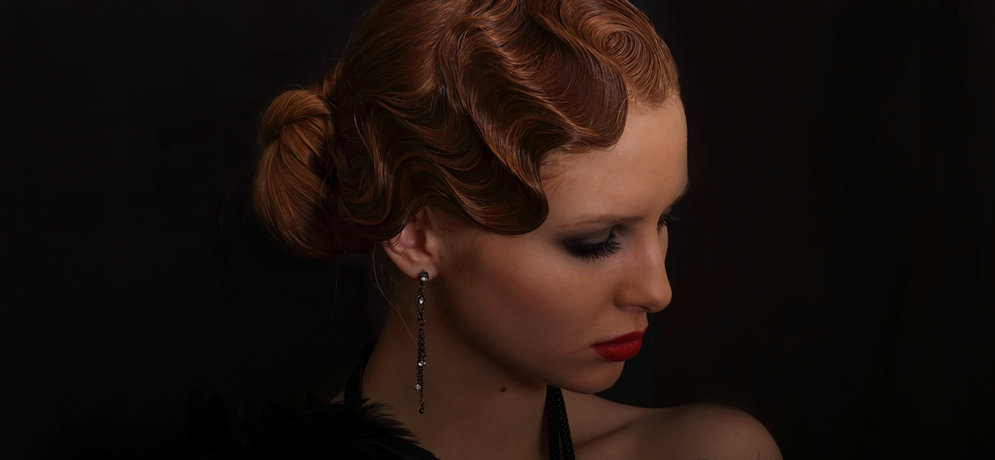
Looking for a hairstyle that’s equal parts trendy, retro, chic and classic? Try finger waves. A popular choice among hair trendsetters like Rhianna, Kim Kardashian, Zendaya and Vanessa Hudgens, finger waves are deep, S-shaped curves that rest close to the scalp, creating dimension and style that flatters all hair types. This flirty look was huge in the 1920s and ’30s — think: glamorous flapper girls — and it’s back in a big way. We’re here to help you achieve it on yourself or your clients.
How to Create Finger Waves
One of the ways finger waves differ from other kinds of waves is that they don’t use heat, which means they’re gentler on the hair. Instead, this technique combines some key hair styling products with combing and hand movement — hence the name — to manipulate the hair into deep, flowy waves. This is what differentiates it from the marcel wave, a similar style achieved by using a curling iron.
Here’s how to achieve finger waves that look amazing. This technique can be used on all hair types, but you may have to make adjustments based on the length and texture of the hair you’re waving.
- Wet and Detangle Hair — This style works best on wet hair because it’s more easily manipulated, so start by fully wetting the hair and combing through with your favorite detangling brush. Unless you prefer to, there is no need to shampoo hair beforehand, as freshly washed hair is less likely to keep its hold. Before you begin, you will want to apply some of your favorite professional hair care products, such as a leave-in conditioner or protectant spray.
- Part and Prep the Hair — Start by parting the hair using a rat tail comb. You can place the part wherever it is the most flattering on the face, but we find that a deep side part is a good choice for this type of wave. Just make sure you have enough hair on one side of the head to create multiple wide waves.
- Apply Setting Mousse — Brush through the hair with a wide-tooth comb using a setting lotion or mousse, applying from scalp to root. Make sure to frame the hair around the hairline in a gentle C-shape rather than brushing the hair directly backwards on the head. Always use a slick mousse or lotion rather than a hard-setting gel, as you will need to be able to move and manipulate the hair without it drying before you’re done.
- Create the Waves — The next step is to build the waves along the side of the head using two fingers and a wide-toothed comb. To create the waves, push the comb forward and back, creating an S-shape along the hairline. Use your middle finger to hold the waves in place while using your index finger to pinch and hold down the new waves as you go. Repeat the process until you have the desired number of waves. If you’re working with longer hair, you can clip the hair into place while working to ensure that it holds its shape. If you’ve never seen this done before, it helps to watch a video tutorial or two to see how the shape of the waves is created.
- Finish with Hair Spray — Once you’re done creating the waves and positioning the hair exactly where you want it, it’s time to finish with some high-quality products. The secret to achieving stunning finger waves that stay defined all day is to use products that keep the hair in place regardless of movement, weather and anything else the day throws your way. Finish off your look with a high-hold hair spray that holds hair in place without making it feel hard or crunchy.

Whether you’re looking to add more options to your services list at the salon or want to try finger waves on yourself for a special event, this guide will help you achieve the perfect look. This glamorous and trendy style can be rocked as an updo for more dressy affairs as well as for casual, everyday looks when you want to make a big statement.


Share Your Feedback