Spring cleaning isn’t just for the house — cleaning up mentally and emotionally by refreshing (and normally lightening) the hair and wardrobe are common, too. Expect your clients to come to you in this mindset and get excited for the pretty trend that will help them do that perfectly: ribbon highlights!
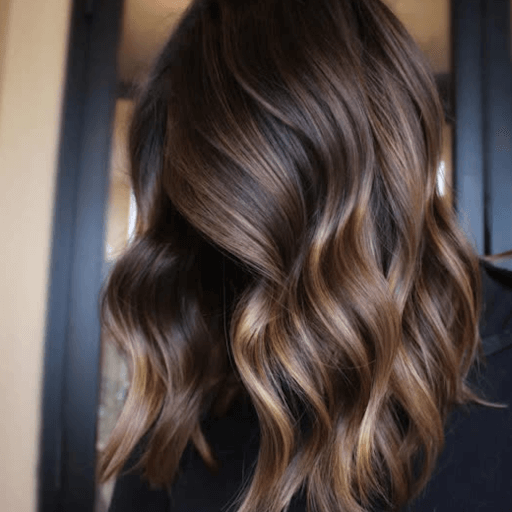
Similar to the balayage technique, ribbon highlights add a dimension to hair through professional hair color and technique. Unlike balayage, these ribbons aren’t concentrated only on the ends of hair. Instead, ribbons of blonde unwrap throughout the whole head of hair. What makes ribbon blonde different from traditional highlights is that while the ribbons are distinctly different shades than the base color, they’re done in a way that embraces natural placement and blending. The result is a gorgeous contrast between shades that creates depth and movement and looks as natural as it does striking!
The Client
While traditional balayage tends to lend itself better to longer strands, ribbon highlights can complement almost any length. Along with this, ribbon lights look as good on icy blondes as they do on redheads, so no base or highlight colors are out of the question!
This means that almost any client looking to lighten up or refresh will do well with this look, and any client who is looking for a crazy color but hesitant to commit will love this subtle solution. If your client is trying to counteract signs of aging, this will also be a good look for them with the addition of some extra ribbons around the face to take a youthful effect.
The Process
The most important thing to remember throughout the process is that ribbon highlights are pretty, light and lived-in, meant to add movement and dimension to already beautiful hair by mindfully breaking up the solid base color. They are not perfectly defined strips in a strict pattern!
1. Gather Your Tools
A bowl
Bleach powder
Developer (likely 20 or 30 volume)
Colorist brush with fine flexible bristles
Gloves
Clips
Tail comb
Optional: bond treatment
2. Section Hair
As always, with a middle part in place, divide dry hair into four even sections and secure with clips.
3. Mix Bleach
The developer you use will depend on your client’s hair needs and goals, but we suspect that this will likely be a 20 or 30-volume salon developer. Mix this with your bleach powder to create a thick, creamy formula. If you mix your bleach into a formula that’s too thick, it will be challenging to paint on properly. If you mix your bleach into a formula that’s too thin, it may bleed into the hair too much. In general, 2 parts powder, 1 part developer will create the ideal consistency for this technique.
4. Paint Balayage Highlights
Painting balayage highlights are all about off-the-root placement and natural placement patterns. Start by taking a section of strands around half of an inch (for thicker ribbons) or a quarter of an inch (for thinner ribbons) thick, and weave out thick chunks with your tail comb in an every-other-one weaving pattern. Hold the chunks you’ve woven out from the head about 90 degrees with good tension. Either with your fingers or a color brush, paint bleach onto these chunks starting from the middle of the strand and moving upward (mostly using downward strokes), blending close to but not on the roots.
Work on one section at a time before moving on to the next, but make sure to create a natural flow. Not all sections should be weaved and lightened!
5. Add Babylights
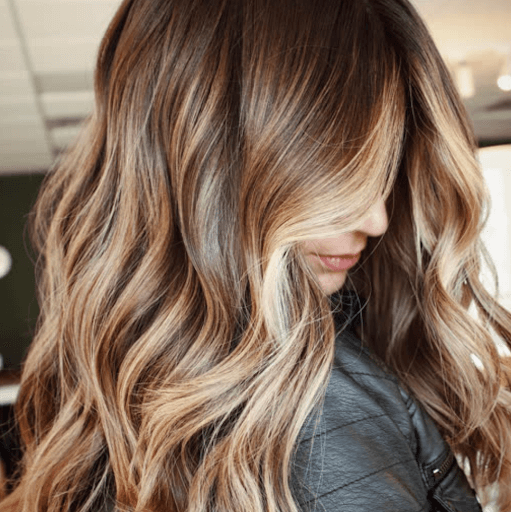
Toward the front of the head, you’ll want to add a couple of babylights between your balayage highlights and possibly even bring them right up to the crown. Similar to a money piece, this will have a brightening effect on young clientele and a youthful effect on older clientele and will tip this look over the line from practically lived-in to prettily lived-in.
6. Let Process and Then Rinse
Once all chosen sections have been saturated with bleach, the hair should be allowed to process. Make sure to follow the product directions to ensure that hair processes for the correct amount of time. From here, all products should be rinsed from hair thoroughly and dried in preparation for the next step.
7. Tone and/or Color
Most clients who come in requesting ribbon highlights will likely be looking to add various shades of blonde to their blonde or brown hair. If this is the case, you’ll want to tone their freshly bleached highlights to make them appear more accurately sunkissed or icy. If your client has come in for some fun color, now would be the time to incorporate it into the ribbon lights!
Maintenance
For any type of highlight, you will probably want to recommend a color-safe shampoo and conditioner, as well as a hair mask or treatment of some sort. Along with this, if ribbons were set closer to the root, try to see about scheduling a touch-up appointment in six to eight weeks. Otherwise, simply remind your client that 12 weeks tends to be top of the line before their lived-in look appears abandoned.
@erinrayhair via Instagram powered by Squarelovin
Mastering the Artform
Ribbon highlights are an art, and when done right, it can be a straight-up masterpiece! Seeing the technique refined into this trendy style feels like a masterpiece every time we see it. Hopefully, it’s inspired you to give it a try!


Share Your Feedback